
Since i use a MacBook I have been getting a bit annoyed at not being able to test my sites in IE6 or IE7 unless i go home and turn on the pc. Sure i can run IE6 in X11 but its slow and a little buggy, plus IE7 doesn’t run at all.
Since i am running Leopard i thought that i would try and install boot camp and then run Windows XP on a new partition on the hard drive. There are tons of tutorials about how to do this and the process is simple but you may have tried doing it only to find Boot Camp crashed whilst making the partition and you end up having to do a hard reset… this will happen time and time again until you do a little bit of tricky.
So here is a quick step by step guide to getting boot camp to work 100%, the guide assumes that you have already tried using boot camp and that it crashed whilst creating a partition…
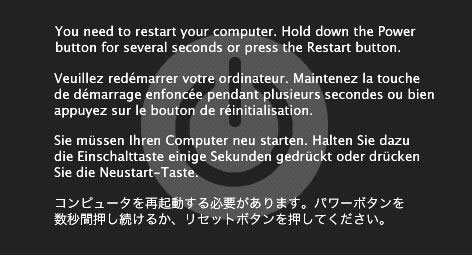
1) Boot camp has just crashed…
2) Place your Leopard install disk 1 into the CD drive and turn off the computer
3) Whilst booting up keep your finger pressed on the C key, this forces your mac boot from the dvd drive
4) Wait ages until OSX installation gets going and the on the menu bar find Disk Utility
5) Select your hard drive in Disk Utility (DU) and click repair…
What we are doing here is rebuilding the partition because when Boot Camp crashed it was half way through creating a new one, thus you will have less space available if you don’t repair the disk
6) Wait for repair to finish and then reboot the machine, again holding C to load the OSX install disk
7) Now we are going to go back into Disk Utility and create the partition that boot camp was supposed too.
The reason boot camp is crashing is caused by it trying to move files from the space that it was going to partition. Since Boot Camp was running in OSX it could not move the files and sent the kernel into a panic. Now we are booting from a CD so by creating the partition we are forcing it to move the files into a different area.
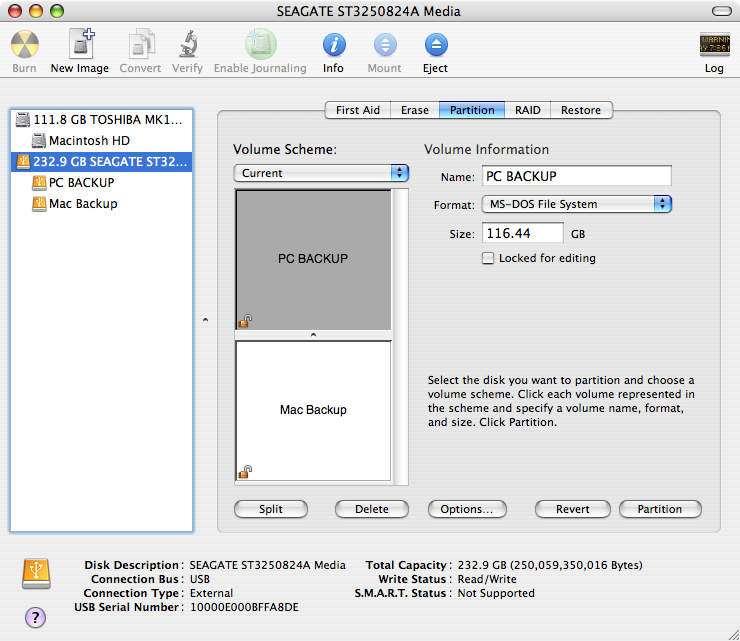
8 ) You will see something similar to the image below, but you will probably only have 1 partition. Simply click on the + arrow at the bottom right (my image doesnt show this) and it will add a new partition. You should resize this to be about 1gb larger than you was planning to use for boot camp
9) Apply the changes and let DU do its work, once it has finished exit out and then reboot, again holding C to boot from the install disk
10) After the disk has loaded again, go back into DU, and select your new partition, click the – button and it will throw up a warning to say that the partition will be deleted but all information on the original partition will be ok. For the love of God make sure you selected the partition that you wanted to delete and triple read the wording to make sure you are removing the new, smaller partition.
10a) You now need to resize the original mac partition so it fills the entire disk, simply grab and drag the partition to fill the space.
Thanks go to Sergio in the comments for pointing out this step i had missed
11) Wait for it to finish, exit out of DU and reboot, DON’T hold C this time, we want to boot into native OSX
12) Go back into Boot Camp and go through the process, now that we have a clean section on the drive it can partition the disk without any issue.

13) Wait until the partition has been made and you should see…
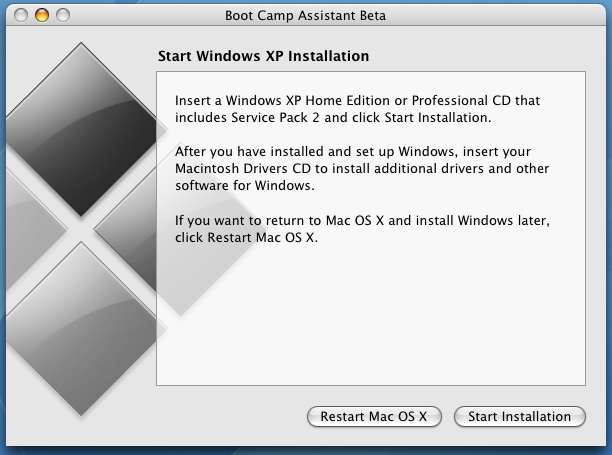
14) Put your Windows XP or Vista (ha) disk in, and wait for an icon to appear on your desktop, once it does hit start installation, and wait for the machine to reboot.
15) You will now reboot into Windows installer mode, go through the yadda yadda and you should see something like…
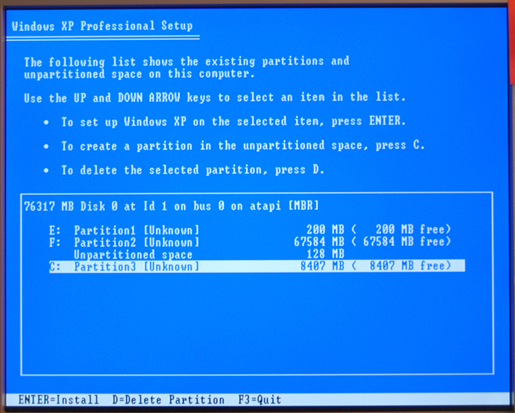
16) Make sure you install on the new partition that was created, the screen shot doesnt show it but OSX will have labelled this partition [BOOTCAMP] [FAT32] – hit enter to install on that partition.
17) When asked how to format i chose Fat 32 as it allows Leopard to actually write files back to a windows disk, you could then say edit a txt file from both within Leopard and XP. Its your choice but make sure you reformat it and dont select the option which says “Leave it how it is”

17) Go through the boring windows setup and wait for it to complete, once Windows runs you will need to pop your Leopard install disk into the machine to install all the windows drivers, this is thankfully painless.
18) Marvel at XP on a Mac, and pat yourself on the back, its been a hell of a ride.
Bonus tip:
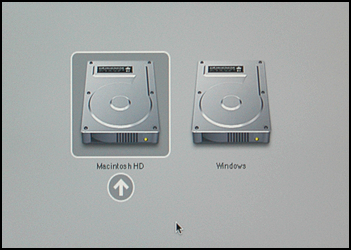
If you want to select which operating system to use during boot up simply keep the option (alt) key pressed and you will get the following screen…
If this has helped you, please leave a comment :o)
Hi Chewie,
thank you for this useful hint, i knew it could be done better than the “backup & reinstall” method propagated by apple.
A small heads-up: instead of repeatedly holding “c” during boot until your fingertips go numb, you can also command the installer to reboot from the dvd automatically, by selecting it as the startup-volume (should be right there in the menu with DU) and subsequently hitting restart. The last time (step 11), select your hd, of course.
Cheers!
Andreas
Another good tip maybe; Bluetooth will not work when starting up from disk so make sure u got a usb keyboard or mouse you can use.. 😉
Hi Andreas,
I am glad the solution worked for you, and thank you for leaving a comment and also your tip. I was getting sick and tired of holding down C so wish i had of realised your method before.
Chewie
Hi Chewie,
I got as far as step 9, but then it came up with the same error as in step 1 (telling me to hold down power button to restart…). This is really frustrating as I haven’t got a clue where to go from here. Any advice would be greatly appreciated?
Jeeves
THANK YOU THANK YOU THANK YOU.
i didnt NOT want to format the whole thing and start from scratch
Hey Jeeves,
Just a couple of things to check…
1) Are you 100% sure that you booted from the Leopard boot disk when trying to change the partition?
2) This may be a silly question. but have you got enough disk space to create a partition.
I would only expect the machine to crash if you was trying to change the partition within OSX and not the boot disk.
Thanks very much for the tip. I was pulling my hair out and thinking I’d have to buy iDefrag or something just to get Windows installed. The tip worked perfectly and everything went smoothly.
Hello All and thank you, you!
My english isn’t perfect so, i don’t understand what exactly to do at step 8:
8 ) You will see something similar to the image below, but you will probably only have 1 partition. Simply click on the + arrow at the bottom right (my image doesnt show this) and it will add a new partition. You should resize this to be about 1gb larger than you was planning to use for boot camp
What do you mean? What i hahe to do exactly? WHat is the arow at bottom right?
Hi David,
For step 8 you should see a button that looks like this [+] which is positioned in the lower section of the screen
You click that and then it will create a new partition that you can resize by sliding it up and down.
You want to make the new partition 1gb bigger than you are intending to use for boot camp.
This worked a treat for me. Thank you very much
Hey, thanks this worked well for me.
Jeeves, I think I ran into the same problem as you, but here’s what I found: After you delete the partition you created, you need to *resize the old partition* back to it’s full size. You do this by dragging the bottom right hand corner of the white box.
It may seem obvious to others, but I missed it the first time and was initially quite confused – Chewie’s solution is quite clever and there’s no reason it shouldn’t work as far as I could nut out. So I went back and did the above, and voila, it worked. Anyway, hth.
Cheers and thanks again for the fix!
I had this problem too and, it turns out, it was actually being caused by the fact that I have some HONKING big (12gb and larger) files on my machine. Disk Utility simply couldn’t cope with any of them.
So, in order to get things working, I repaired my drive following the instructions in your post, and then had to move any files over 1gb onto an external drive (this includes things like parallels installations).
Works like a charm now! Thanks, Chewie!
great post, you just saved me a lot of effort backing everything up and reinstalling like apple said.
[…] I came across a workable solution while hunting through the internet this afternoon. Hopefully it finds some of you helpful. […]
THANK YOU! Seriously this guide is extremely useful.
Hi I have the same problem my computer crashed while doing the partition and I followed Chewie method, while installing the OX CD 1 I was either delete to old or to archive and install, its says it cant continue because I have an updated OX in my computer, what should should I do.
Many thanks
Hey Clarisse
Can you explain a bit more about your problem? You shouldn’t have to reinstall OSX at all. You are just using it as a boot disk to open disk utility so once it has booted up you should be able to select disk utility from the menu bar.
Hi Chewie,
I manage to repair the disk But I cant see the image like in step 8… You will see something similar to the image below.
I went to the bootcamp assistant again but I got an error stating that I cant do the partition and the disk need repairing….
Ohhh Boy I have been doing this all day… Please help
Yep, there’s a step you missed Chewie, between 10 and 11.
Because after deleting this new partition, you need to resize the original (Macintosh) partition to it’s original size. I was also very confused with this, but finally figured it out.
Anyway, thanks for posting this tutorial; after almost 2 years of owning my MBPro, I was finally able to install WinXP on it, and it works great!
Hi Sergio,
Thanks for pointing that out for me, i have edited the steps and credited you for spotting it.
Glad you finally managed to get Xp installed on the pro :o)
clarisse
I would suggest running disk utility again from the boot dvd and running a full repair.
Then once it has done that, restart the machine again booting from the dvd and go into the disk utility and hopefully you will see something similar to my image which will let you create a new partition.
Hi Chewie,
I have tried again and again but I still have the same problem once I do the boot camp partition and I have an error stating the disk error and I should run repair.
What should I do now. Please help
Many thanks,
Clarisse
Hi I have tried all of these steps to no avail! My problem is once i go to create the second partition using du it attempts to map then says I havent enough room. yet i have over thirty unused gigs
Clarisse: I have no idea why you are constantly getting the error without seeing your machine. I hate to say it but you may have to resort to backing up and then reinstalling Leopard :o(
Nathan: Have you tried to create a really small partition, e.g 5gb?
Hi Chewie,
Many thanks, I have never use a Mac before so I don’t really know how to install Leopard, means what should I do.
Regards,
Clarisse
hi Chewie,
please read this carefully and try to help me if u dont mind.
i have a MacBook Pro. i had windows XP and Mac OS both installed on it. there was only one drive or one partition. i wanted to make it two partitions so i used a Windows bootable CD to do that. when i got that screen that shows a list of the partions on the hard drive, i found three parts. i chose the one that didnt have anything on and formatted it to create a part.,…
here comes the problem. when i restarted my PC, my system crashed and i couldnt even access to it not even in the safe mode.
this PC is not mine. it belongs to someone else and he has all his work files on it. if he finds out that i did this to his PC, it is gonna be the end of the world to me. so please help me…
besso
Clarisse:
I am sorry for the long reply, I didn’t realise you had commented further. Leopard is the disc that comes with your Mac. If your not really sure what the disc is then i don’t think you should play around with it.
Besso:
I am struggling to understand why you decided to create another partition on the disc when the MacBook was already running windows and OSX?
You are going to need to get hold of the Leopard disc so that you can boot from that (Put the disc in a hold C on the keybord). Once it has all loaded you want to goto Disc Utility and then look at the partitions. If i understand you correctly their should be 3 different partitions, you probably want to delete the new one that you made.
Hope that helps.
thanks alot Chewie, but i need to tell you that i finally decided to format the whole thing and create two new partitons.
Now, I have C: and D:. i also got the two disks of mac OS.
the problem now is that i want to install both wndows XP and Mac OS X each one on a drive. the first on the C: drive and the other on the D:.
i installed windows XP and then tried to install Mac OS X after windows.
I put the CD that is labled: “Mac OS X Install Disk 1” and then i followed the wizard till i reached the finish up part and suddenly an error message appeared. it said something like: “the installation has failed, please try again”.
i dunno what to do now, especially that i must give in the labtop in 2-3 days max.
please help me find out how to finish this.
thanks chewie
besso
Hi besso,
I think the best thing for you to do is to format the computer again and put the Mac OSX disk in first and install that. It sounds to me like you are trying to install windows first n then OSX over the top which is not advisable.
Put OSX in and boot from disc by holding down C, then go into disk utlity and make sure there is only one clean drive. Install osx onto that AND then use bootcamp to install windows.
hi chewie,
thanks so much for your post,
it means if i wanna isntall linux, then i just insert linux cd/dvd into dvd drive (step 14)?
Hi NRA:
Unfortunately, i don’t think that it is that easy.
What you will probably have to do is create another partition that you will be using for your Linux install and then restart and boot from the Linux DVD to install onto that partition. You could try it from boot camp, but i think it may need to be done manually.
The problem is that i do not know if you will then be able to select the linux install when booting up the Mac with the option key pressed.
I found some information here but its pretty low level stuff and can get complicated…
http://wiki.onmac.net/index.php/Triple_Boot_via_BootCamp
If you do try it then please come back and let me know how you get on. As i say i have not tried this so i dont know how successful it will be.
hi chewie!
thank you so much for writing this guide!
i was having these exact same problems and this guide was the only resource i could find online to solve it.
major thank yous, it worked like a charm!
b
Hey Booce,
Thanks for the kind words, glad it helped you out 🙂
This will be helpful to me when my company’s MAC users have problems with Bootcamp crashes. I’ll just refer them to this blog post. Thanks.
Hi Chewie,
Thank you for your post.
It took a while, but I have finally installed Win XP on my old MBP 😀 I have found one big problem during the process. My HDD has 120GB capacity. I have installed fresh Snow Leopard and I had left like 110GB. I decided to create 95GB partition for Windows. It didn't work. The biggest size I could create in Disk Utility was 85GB. Then another discovery was made when I realized that I need a bit of space/margin between the size “created” in DU and the one chosen later in Boot Camp Assistant (it was more than 1GB for me so I guess that it depends on the size of final partition?). I ended up with 85GB in DU and 80 in BCAssistant.
Thank you once more.
Hey Chewie.
I must thank-you for your assistance. A friend of mine directed me to this site when he found out that I was having problem with Boot Camp. At first I was sceptical because this is for Lepoard and I run Snow Lepoard but to my great benifit, it easily translated over.
Thank-you again. This saved me hours on end spent on the phone with Apple. : )
Thanks for the kind words, i am glad that you managed to get it sorted 🙂
Hi Chewie,
I have a problem actually partitioning the hard drive itself. I have a 13″ MacBook Pro running Snow Leopard. When I boot into setup, all goes well when I repair the disc. (One thing to note; I have locked down my Mac so it can only boot to the disc, and pressing and holding option on boot. This means I have to type in my password before booting from a disc, this just makes it impossible for someone to reset my password if they ever steal my Mac). Anyway, when it is time to partition in DU, halfway through I get an error message saying, “Partition failed, file size to big, try making the file size smaller” or something like that. I need to keep the partition size at least 33 GB for the programs that I want to install, and even when I tried to make the size smaller, I kept getting that message. I tried defraging, but still no luck. Any suggestions?
Thanks,
Daniel
Thanks Chewie,
Now I can play Civilization iv – which only cost me 1p for the pc version instead of the £25 for mac!!!
Thanks Chewie,
Now I can play Civilization iv – which only cost me 1p for the pc version instead of the £25 for mac!!!
If the swap file is the one which has been placed at the end of the volume, re partitioning will not help. Rather than using an expensive app like iDefrag (~ $30) … just disable the VM for a while and delete the swap file.
Step 1:
sudo launchctl unload -w /System/Library/LaunchDaemons/com.apple.dynamic_pager.plist
sudo rm /private/var/vm/swapfile*
Step 2:
Once this step is done, go back to Bootcamp assistant and the partitioning should go thru. Thereafter you can re enable the swap file.
Step 3:
sudo launchctl load -wF /System/Library/LaunchDaemons/com.apple.dynamic_pager.plist
Confirm that the swap file has been created in /private/var/vm/
Step 4:
Now go ahead and tell Bootcamp to boot into windows CD.
Guys, this worked for me and I didnt have to pay $30 just for moving one file. But I DO NOT provide ANY guarantees. Please do the sensible thing and backup your OSX partition before you try this stunt.
If it works for you, drop me a line on sanjay dot vyas at gmail dot com
Cheers for this, really helped me in a crisis!
Robb.
if you get used to use a windows system, you will find that the ios is really difficult to use
You help me!reading your article before I have a lot of problems ,but understand all now.thanks!
Hi Chewie! This has been very useful, however, still when i run bootcamp assistant it tells me that it cannot create the partition because some files cannot be moved. Any thoughts? Thank you very much.
On my Imac it all worked fine. My macbook, I had installed XP before A long stay in Europe, came back to the states and got rid of the windows partition. I need to run windows again now and Installed Vista on my friends new macbook just fine. I had several issues at first this time. First about space, fixed that and hit another problem.. corruption.. Fixed all that.. Now I keep crashing hard everytime its attempting to make the partition. Size I had allocated for the partition is gone, Does not show up anywhere. I then have to repair the disc again to get it to restore the memory size. I’m lost at this point as to why. I even tried transferring the bootcamp utility from my imac onto the macbook. Both intels core duo.. imac 2 gigs of ram black macbook 1 gig. I also tried partitioning in safemode, thinking maybe some 3rd party software was causing it. Nothing else plugged in but power.
————–
Leo
mcdst
U.S.A